If you’ve ever wanted to create a NAS with Raspberry Pi, you’re in the right place. A Network Attached Storage (NAS) device is a fantastic way to centralize your files, making them accessible to everyone in your home. With a Raspberry Pi, you can build a cost-effective, energy-efficient NAS that’s perfect for whole-home file sharing.
This guide will walk you through the entire process, from setting up your Raspberry Pi to configuring file-sharing protocols and securing your system. Whether you’re a tech enthusiast or a beginner, you’ll find this step-by-step tutorial easy to follow.
Why Raspberry Pi for NAS?
Raspberry Pi is an excellent choice for creating a NAS because it’s affordable, compact, and consumes very little power. Unlike traditional NAS devices, which can be expensive and overkill for home use, a Raspberry Pi NAS offers just the right amount of functionality without breaking the bank.
What You’ll Achieve
By the end of this guide, you’ll have a fully functional NAS system that allows you to:
– Store and share files across all your devices.
– Access your files from anywhere in your home network.
– Enjoy a secure and customizable storage solution.
Ready to get started? Let’s dive into the first steps to create a NAS with Raspberry Pi and unlock the potential of whole-home file sharing!
Why Choose Raspberry Pi to Create a NAS?
When it comes to building a NAS, the Raspberry Pi stands out as a top choice for DIY enthusiasts and budget-conscious users alike. If you’re looking to create a NAS with Raspberry Pi, here’s why this tiny yet powerful device is the perfect solution for your home file-sharing needs.
Cost-Effectiveness
One of the biggest advantages of using a Raspberry Pi is its affordability. Traditional NAS devices can cost hundreds of dollars, but a Raspberry Pi setup can be assembled for a fraction of the price. With just a Raspberry Pi board, an external hard drive, and a few accessories, you can create a fully functional NAS without breaking the bank.
Energy Efficiency
Raspberry Pi devices are incredibly energy-efficient, consuming only a few watts of power. This makes them ideal for running 24/7 as a NAS, ensuring your files are always accessible without driving up your electricity bill.
Compact and Versatile
The Raspberry Pi’s small size makes it easy to tuck away in any corner of your home. Despite its compact form, it’s highly versatile and can handle a variety of tasks, from file storage to media streaming. Plus, its open-source nature allows for endless customization to suit your specific needs.
Beginner-Friendly
Even if you’re new to DIY tech projects, the Raspberry Pi is beginner-friendly. With a wealth of online resources, tutorials, and community support, you’ll find it easy to set up and maintain your NAS.
Real-World Example
Imagine having a central hub for all your family photos, videos, and documents. With a Raspberry Pi NAS, everyone in your household can access these files from their laptops, tablets, or smartphones without needing to transfer files manually.
In summary, choosing a Raspberry Pi to create a NAS is a smart, cost-effective, and energy-efficient way to meet your home file-sharing needs. Ready to get started? Let’s move on to gathering the components you’ll need!
What You Need to Create a NAS with Raspberry Pi
Before you can create a NAS with Raspberry Pi, you’ll need to gather a few essential components. Don’t worry—most of these items are affordable and easy to find. Here’s a checklist of everything you’ll need to set up your NAS system:
1. Raspberry Pi Board
The heart of your NAS setup is the Raspberry Pi itself. Any model from the Raspberry Pi 3 or later will work, but the Raspberry Pi 4 is highly recommended for its faster processing power and Gigabit Ethernet support.
2. External Storage
You’ll need one or more external hard drives or SSDs to store your files. Choose drives with enough capacity to meet your storage needs. For example:
– A 1TB drive for basic file storage.
– Larger drives (4TB or more) for media libraries or backups.
3. MicroSD Card
A microSD card (at least 16GB) is required to install the operating system for your Raspberry Pi. Opt for a high-quality card to ensure reliability.
4. Power Supply
A reliable power supply is crucial to keep your Raspberry Pi running smoothly. Make sure it’s compatible with your Raspberry Pi model (e.g., a 5V/3A USB-C adapter for the Raspberry Pi 4).
5. Ethernet Cable
For the best performance, connect your Raspberry Pi to your home network using an Ethernet cable. This ensures fast and stable file transfers.
6. Case (Optional but Recommended)
A case will protect your Raspberry Pi from dust and physical damage. Look for one with proper ventilation to prevent overheating.
7. Cooling Solutions (Optional)
If you plan to run your NAS 24/7, consider adding a heatsink or a small fan to keep your Raspberry Pi cool.
Real-World Tip
If you’re on a tight budget, start with a single external hard drive and upgrade later as your storage needs grow. You can also repurpose old drives you already own to save money.
With these components in hand, you’re ready to start building your Raspberry Pi NAS. Next, we’ll walk you through installing the operating system!
Step 1: Install the Operating System on Your Raspberry Pi
The first step to create a NAS with Raspberry Pi is installing the right operating system (OS). A lightweight OS will ensure your Raspberry Pi runs efficiently and is ready for NAS functionality. Here’s how to get started:
Choose Your Operating System
Two popular options for a Raspberry Pi NAS are:
1. Raspberry Pi OS (formerly Raspbian): A beginner-friendly OS that’s easy to set up and customize.
2. OpenMediaVault (OMV): A dedicated NAS OS designed for file sharing and storage management.
For beginners, Raspberry Pi OS is a great starting point. If you’re comfortable with more advanced setups, OpenMediaVault offers additional features tailored for NAS systems.
How to Install the OS
Download the OS Image:
- Visit the official Raspberry Pi website to download Raspberry Pi OS or the OpenMediaVault website for OMV.
- Choose the Lite version if you prefer a minimal setup without a graphical interface.
Flash the OS to Your MicroSD Card:
- Use a tool like Raspberry Pi Imager or balenaEtcher to write the OS image to your microSD card.
- Insert the microSD card into your computer, select the downloaded OS image, and flash it to the card.
Set Up Wi-Fi (Optional):
- If you’re using Wi-Fi instead of Ethernet, create a
wpa_supplicant.conffile on the microSD card to store your Wi-Fi credentials.
- If you’re using Wi-Fi instead of Ethernet, create a
Enable SSH (Optional but Recommended):
- Create an empty file named
ssh(no extension) on the microSD card to enable remote access via SSH.
- Create an empty file named
Boot Up Your Raspberry Pi:
- Insert the microSD card into your Raspberry Pi, connect it to power, and boot it up.
Real-World Tip
If you’re new to Raspberry Pi, start with Raspberry Pi OS to familiarize yourself with the system. Once you’re comfortable, you can switch to OpenMediaVault for more advanced NAS features.
With the OS installed, your Raspberry Pi is now ready for the next step: connecting your external storage devices. Let’s move on!
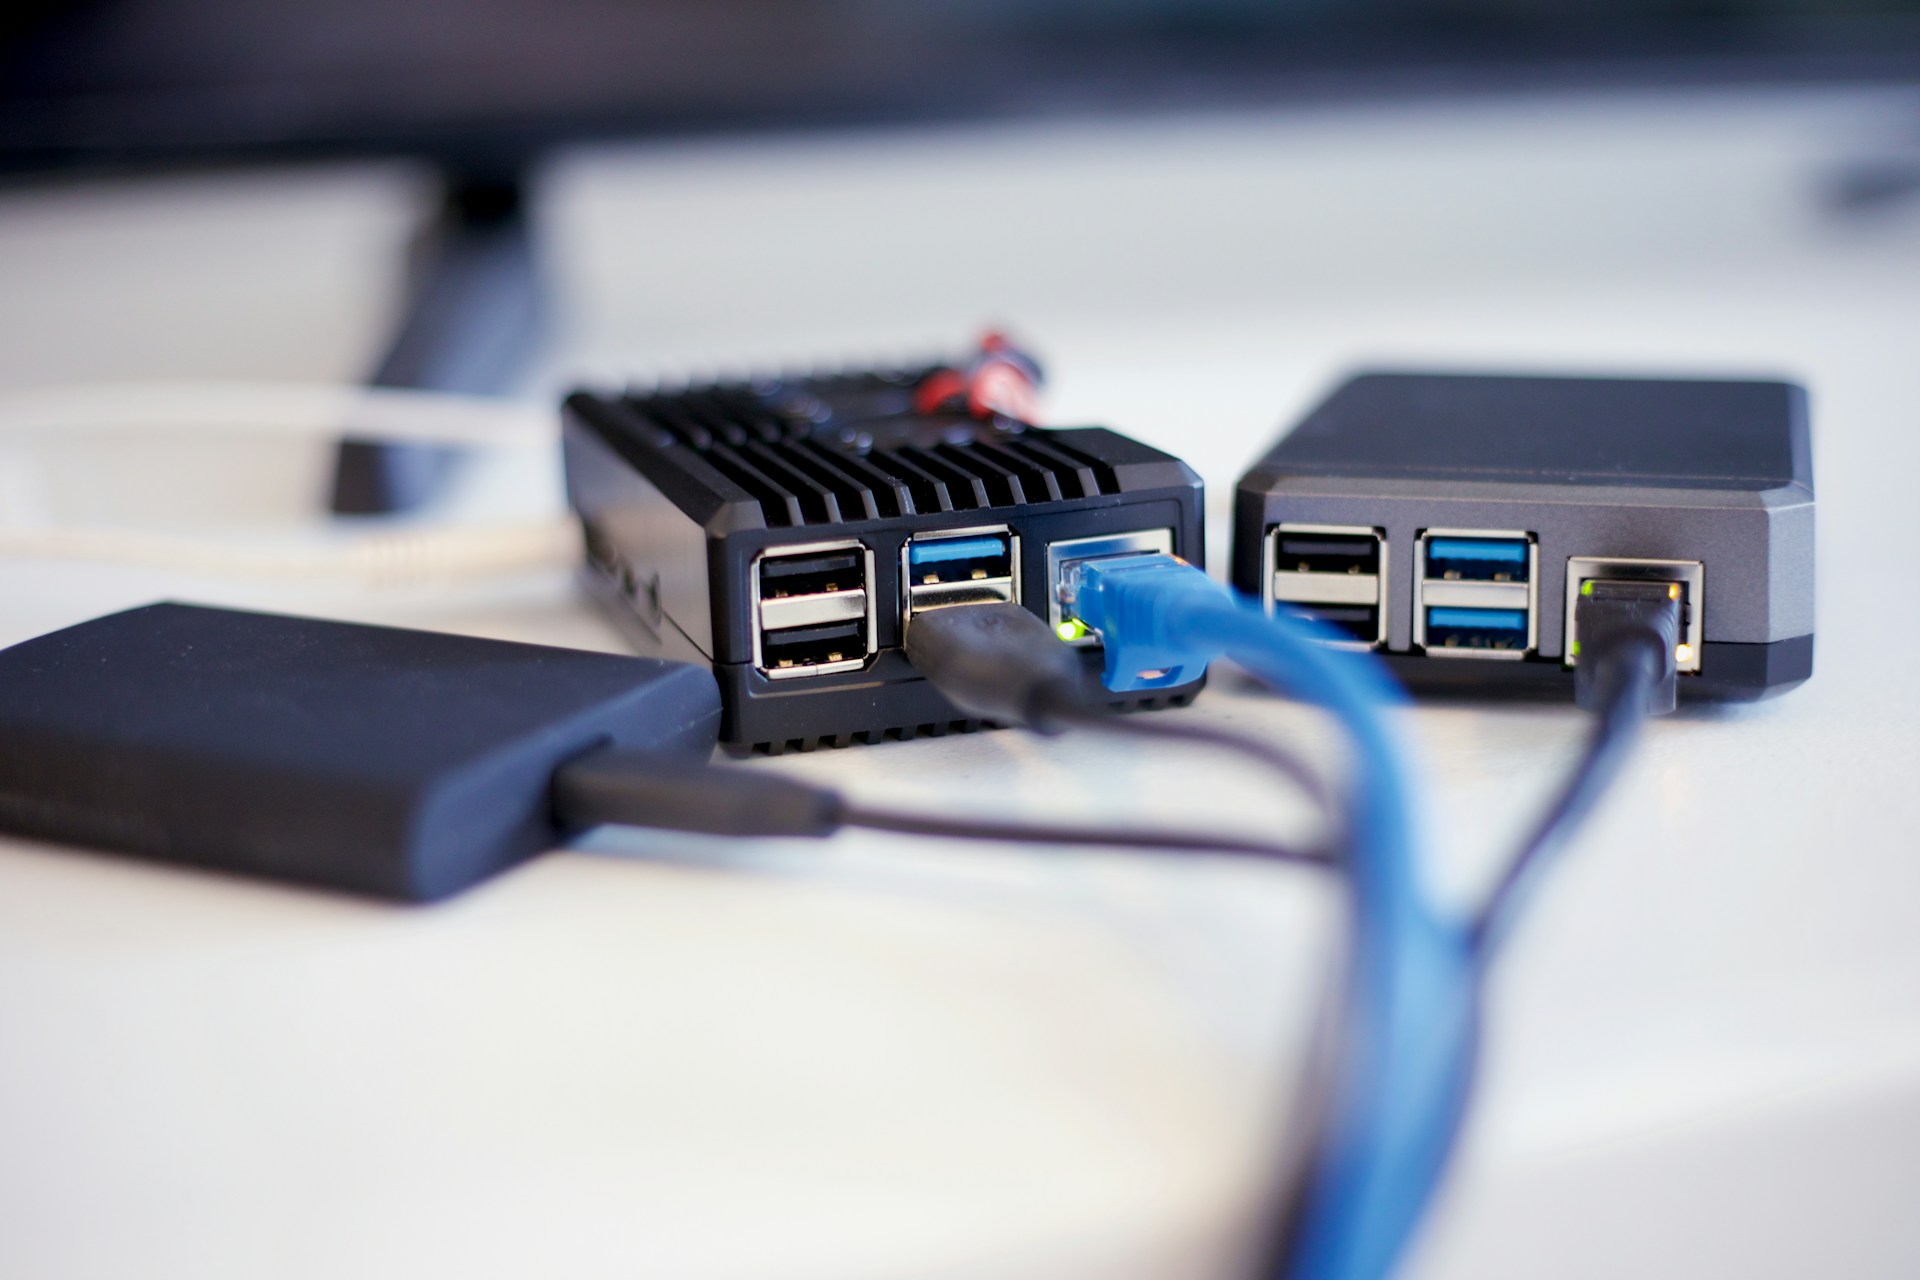
Step 2: Connect Your External Storage Devices
Now that your Raspberry Pi is up and running with the operating system, it’s time to connect your external storage devices. This step is crucial to create a NAS with Raspberry Pi that offers ample storage for your files. Here’s how to do it:
1. Choose the Right Storage
- External Hard Drives: Ideal for large storage needs (1TB or more).
- SSDs: Faster and more durable, but typically more expensive.
Ensure your drives are formatted with a compatible file system like ext4, which works well with Linux-based systems.
2. Connect Your Drives
- Use USB ports on your Raspberry Pi to connect your external drives.
- If you’re using multiple drives, consider a powered USB hub to avoid overloading the Raspberry Pi’s power supply.
3. Mount the Drives
Once connected, you’ll need to mount the drives so your Raspberry Pi can access them:
1. Open the terminal or SSH into your Raspberry Pi.
2. Use the lsblk command to list all connected storage devices and identify your external drives.
3. Create a mount point (a directory) for each drive:
bash
 sudo mkdir /mnt/drive1
4. Mount the drive:
bash
 sudo mount /dev/sda1 /mnt/drive1
Replace /dev/sda1 with the correct identifier for your drive.
4. Automate Mounting on Boot
To ensure your drives are automatically mounted every time your Raspberry Pi starts:
1. Edit the /etc/fstab file:
bash
 sudo nano /etc/fstab
2. Add a line for each drive:
/dev/sda1 /mnt/drive1 ext4 defaults 0 0
3. Save and exit the file.
Real-World Tip
If you’re using a single large drive, consider partitioning it into smaller sections for better organization. For example, one partition for media files and another for backups.
With your external storage devices connected and configured, your Raspberry Pi NAS is starting to take shape. Next, we’ll set up file-sharing protocols to make your files accessible across your home network!
Step 3: Set Up File-Sharing Protocols
To create a NAS with Raspberry Pi that truly shines, you’ll need to configure file-sharing protocols. These protocols allow devices on your home network to access and share files stored on your NAS. The two most popular options are SMB (Samba) and NFS. Here’s how to set them up:
1. SMB (Samba) for Windows and macOS
Samba is a versatile protocol that works seamlessly with Windows, macOS, and Linux. To set it up:
1. Install Samba:
bash
 sudo apt update
 sudo apt install samba
2. Configure Samba:
– Edit the Samba configuration file:
bash
 sudo nano /etc/samba/smb.conf
– Add a new share at the bottom of the file:
 [SharedFolder]
 path = /mnt/drive1
 browseable = yes
 writable = yes
 create mask = 0777
 directory mask = 0777
 public = no
– Replace /mnt/drive1 with the path to your shared folder.
3. Set a Samba password for your user:
bash
 sudo smbpasswd -a pi
4. Restart the Samba service:
bash
 sudo systemctl restart smbd
2. NFS for Linux Devices
NFS (Network File System) is ideal for Linux-based devices. To enable NFS:
1. Install NFS:
bash
 sudo apt install nfs-kernel-server
2. Configure NFS:
– Edit the exports file:
bash
 sudo nano /etc/exports
– Add a line for your shared folder:
/mnt/drive1 192.168.1.0/24(rw,sync,no_subtree_check)
– Replace /mnt/drive1 with your folder path and 192.168.1.0/24 with your network range.
3. Restart the NFS service:
bash
 sudo systemctl restart nfs-kernel-server
Real-World Tip
If you have a mix of devices on your network, consider enabling both SMB and NFS. This ensures compatibility across all platforms.
With file-sharing protocols configured, your Raspberry Pi NAS is now ready to serve files to all your devices. Next, we’ll secure your NAS with user permissions to keep your data safe!
Step 4: Secure Your NAS with User Permissions
When you create a NAS with Raspberry Pi, security should be a top priority. Implementing user permissions and access controls ensures that only authorized users can access your files. Here’s how to secure your NAS effectively:
1. Create User Accounts
Start by creating separate user accounts for everyone who needs access to the NAS:
1. Add a new user:
bash
 sudo adduser username
Replace username with the desired name.
2. Set a strong password for the user.
2. Assign Folder Permissions
Control who can read, write, or execute files in your shared folders:
1. Change the ownership of the shared folder:
bash
 sudo chown -R username:groupname /mnt/drive1
Replace username and groupname with the appropriate values.
2. Set folder permissions:
bash
 sudo chmod -R 770 /mnt/drive1
This gives the owner and group full access while restricting others.
3. Configure Samba User Access
If you’re using Samba, link your system users to Samba:
1. Add the user to Samba:
bash
 sudo smbpasswd -a username
2. Restrict access in the Samba configuration file:
– Edit /etc/samba/smb.conf:
bash
 sudo nano /etc/samba/smb.conf
– Add valid users = username under your shared folder section.
4. Enable SSH Security
If you’re using SSH for remote access, enhance its security:
1. Disable root login:
bash
 sudo nano /etc/ssh/sshd_config
Set PermitRootLogin no.
2. Use SSH keys instead of passwords for authentication.
Real-World Tip
Regularly review and update user permissions, especially if someone no longer needs access. This minimizes the risk of unauthorized access.
By securing your NAS with user permissions, you’re ensuring that your files remain private and protected. Next, we’ll explore how to optimize your NAS for peak performance!
Step 5: Optimize Your NAS for Performance
Once you’ve set up and secured your Raspberry Pi NAS, it’s time to fine-tune it for optimal performance. By following these tips, you can ensure your NAS runs smoothly and efficiently, making it a reliable solution for whole-home file sharing.
1. Enable SSH for Remote Management
SSH (Secure Shell) allows you to manage your Raspberry Pi NAS from another device. To enable SSH:
1. Open the terminal and run:
bash
 sudo raspi-config
2. Navigate to Interfacing Options > SSH and enable it.
3. Use an SSH client like PuTTY (Windows) or Terminal (macOS/Linux) to access your Raspberry Pi remotely.
2. Set Up Automatic Backups
Protect your data by configuring automatic backups:
1. Use a tool like rsync to back up files to another drive or a cloud service.
2. Schedule backups using cron:
– Edit the crontab file:
bash
 crontab -e
– Add a line to schedule backups, e.g., daily at 2 AM:
0 2 * * * rsync -av /mnt/drive1 /mnt/backupdrive
3. Monitor System Performance
Keep an eye on your NAS’s performance to prevent issues:
1. Use htop to monitor CPU and memory usage:
bash
 sudo apt install htop
 htop
2. Check disk health with smartctl:
bash
 sudo apt install smartmontools
 sudo smartctl -a /dev/sda
4. Optimize Network Settings
Ensure fast file transfers by optimizing your network:
1. Use a wired Ethernet connection instead of Wi-Fi for better stability and speed.
2. Adjust the MTU (Maximum Transmission Unit) size for improved performance:
bash
 sudo ifconfig eth0 mtu 9000
5. Keep Your System Updated
Regular updates improve performance and security:
1. Update your Raspberry Pi OS and installed packages:
bash
 sudo apt update
 sudo apt upgrade
Real-World Tip
If you’re using your NAS for media streaming, consider installing Plex or Kodi to enhance your media-sharing experience.
By optimizing your Raspberry Pi NAS, you’ll enjoy faster performance, better reliability, and peace of mind knowing your data is secure. Next, we’ll show you how to access your NAS from any device!
Step 6: Access Your NAS from Any Device
One of the best features of a Raspberry Pi NAS is the ability to access your files from any device in your home network. Whether you’re using Windows, macOS, Linux, or even a mobile device, here’s how to connect to your NAS effortlessly.
1. Accessing from Windows
Windows users can easily connect to a Raspberry Pi NAS using SMB (Samba):
1. Open File Explorer and click on This PC.
2. Select Map network drive from the top menu.
3. Enter the NAS address in the format:
\\raspberrypi\SharedFolder
Replace raspberrypi with your Raspberry Pi’s hostname and SharedFolder with the name of your shared folder.
4. Enter your Samba username and password when prompted.
2. Accessing from macOS
macOS also supports SMB for seamless NAS access:
1. Open Finder and click Go > Connect to Server.
2. Enter the NAS address:
smb://raspberrypi/SharedFolder
3. Provide your Samba credentials to connect.
3. Accessing from Linux
Linux users can connect using either SMB or NFS:
– For SMB:
bash
 sudo mount -t cifs //raspberrypi/SharedFolder /mnt/nas -o username=yourusername
– For NFS:
bash
 sudo mount raspberrypi:/mnt/drive1 /mnt/nas
4. Accessing from Mobile Devices
You can even access your NAS from your smartphone or tablet:
– Android: Use apps like Solid Explorer or CX File Explorer to connect to your SMB share.
– iOS: Use the Files app or third-party apps like FileExplorer to access your NAS.
Real-World Tip
For remote access outside your home network, consider setting up a VPN or using a service like Nextcloud. This allows you to securely access your files from anywhere.
With these steps, you can now access your Raspberry Pi NAS from virtually any device, making file sharing more convenient than ever. Next, we’ll tackle common troubleshooting issues to keep your NAS running smoothly!
Step 7: Troubleshooting Common Issues
Even the best setups can run into hiccups. When you create a NAS with Raspberry Pi, you might encounter issues like slow transfer speeds, connectivity problems, or storage errors. Here’s how to troubleshoot and resolve these common challenges:
1. Slow Transfer Speeds
If file transfers are slower than expected:
– Check Your Network Connection: Ensure your Raspberry Pi is connected via Ethernet for the best performance. Wi-Fi can be slower and less reliable.
– Optimize Samba Settings: Edit /etc/samba/smb.conf and add the following under the [global] section:
socket options = TCP_NODELAY IPTOS_LOWDELAY SO_RCVBUF=65536 SO_SNDBUF=65536
– Upgrade Your Hardware: If you’re using an older Raspberry Pi model, consider upgrading to a Raspberry Pi 4 for Gigabit Ethernet support.
2. Connectivity Issues
If devices can’t connect to your NAS:
– Check IP Address: Ensure your Raspberry Pi has a static IP address to avoid conflicts.
– Verify Samba/NFS Configuration: Double-check your Samba or NFS settings to ensure the shared folders are correctly configured.
– Restart Services: Restart the Samba or NFS service:
bash
 sudo systemctl restart smbd
 sudo systemctl restart nfs-kernel-server
3. Storage Errors
If your external drives aren’t working properly:
– Check Drive Health: Use smartctl to inspect your drive’s health:
bash
 sudo smartctl -a /dev/sda
– Reformat the Drive: If the drive is corrupted, back up your data and reformat it using a compatible file system like ext4.
– Ensure Proper Power Supply: Use a powered USB hub if your drives aren’t getting enough power from the Raspberry Pi.
4. Permission Problems
If users can’t access files:
– Verify Permissions: Use ls -l to check folder permissions and adjust them if necessary:
bash
 sudo chmod -R 770 /mnt/drive1
– Check Samba User Mapping: Ensure the user is correctly added to Samba:
bash
 sudo smbpasswd -a username
Real-World Tip
Keep a log of any changes you make to your NAS setup. This makes it easier to identify the cause of issues and revert changes if needed.
By addressing these common issues, you’ll keep your Raspberry Pi NAS running smoothly and ensure a seamless file-sharing experience. Now, it’s time to enjoy the convenience of your DIY NAS!
Conclusion: Enjoy Your Raspberry Pi NAS
Congratulations! You’ve successfully learned how to create a NAS with Raspberry Pi, transforming this tiny device into a powerful and cost-effective storage solution for your home. With your NAS up and running, you can now enjoy seamless whole-home file sharing, secure backups, and easy access to your files from any device.
Why Your Raspberry Pi NAS is a Game-Changer
- Affordable and Energy-Efficient: Unlike traditional NAS devices, your Raspberry Pi NAS is budget-friendly and consumes minimal power.
- Customizable: Tailor your NAS to meet your specific needs, whether it’s for media streaming, file backups, or collaborative projects.
- Beginner-Friendly: Even if you’re new to DIY tech projects, the Raspberry Pi NAS setup is straightforward and rewarding.
Real-World Benefits
Imagine having all your family photos, videos, and important documents stored in one central location. No more searching through multiple devices or dealing with USB drives. With your Raspberry Pi NAS, everyone in your household can access shared files effortlessly, making collaboration and organization a breeze.
What’s Next?
Now that your NAS is operational, consider exploring additional features to enhance its functionality:
– Media Streaming: Install Plex or Kodi to turn your NAS into a media server.
– Cloud Integration: Use Nextcloud to create your own private cloud for remote access.
– Automated Backups: Set up regular backups to protect your data from accidental loss.
Final Thoughts
Building a Raspberry Pi NAS is not just about creating a storage solution—it’s about empowering yourself with the knowledge to customize and control your digital life. Whether you’re a tech enthusiast or a casual user, this project offers a perfect blend of simplicity, affordability, and versatility.
So, sit back, relax, and enjoy the convenience of your Raspberry Pi NAS. You’ve earned it!
Leave a Reply